Tuesday, July 22, 2014

Cake Alaska

Cake Alaska with Chocolate Ganache
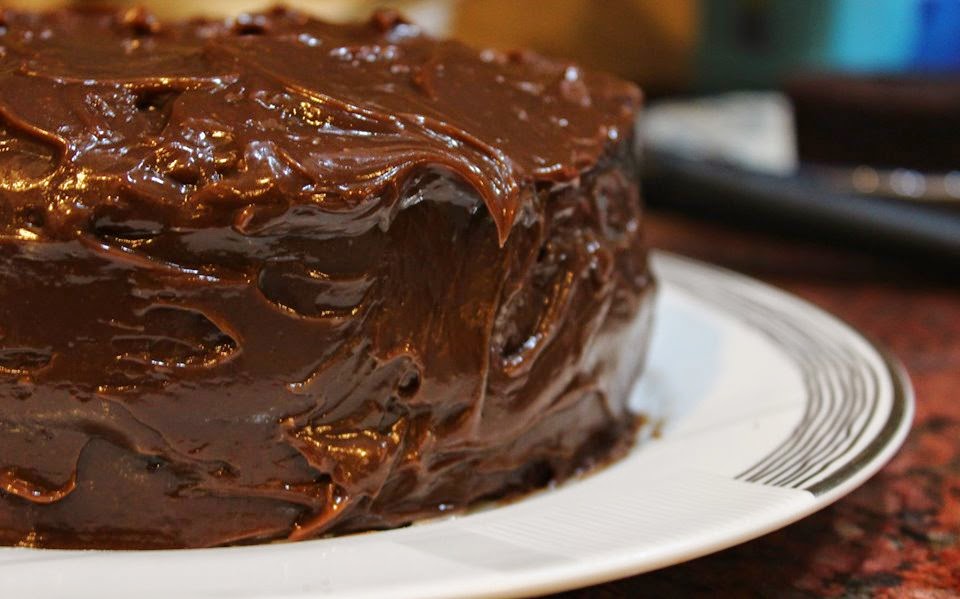
Some recipes are your all time favourite, and this is mine! Its my midnight treat. Cake Alaska is a must in summers, and if you haven't ever tried it, well then, you're missing a lot. I'm not completely following the traditional recipe of flaming Alaska cake or baking ice cream filled chocolate cake at 300degrees, my recipe is very simple yet classic. I skipped the meringue and added ganache to the recipe, so here's it.


Ingredients:
- 2 cups plus 2 tablespoons sugar (icing sugar for best results)
- 1 3/4 cups all purpose flour
- 3/4 plus 2 tablespoons unsweetened cocoa powder
- 1 1/2 teaspoons baking powder
- 1 1/2 teaspoons baking soda
- 1 1/2 teaspoons salt
- 2 large eggs
- 1 cup milk
- 1/2 cup vegetable oil
- 1 tablespoon pure vanilla extract
- 3/4 cup plus 2 tablespoons boiling water

DIRECTIONS:
Step #1: Preheat the oven to 180 degrees.
Step #2: Whisk all the dry ingredients of the cake, in a large bowl. Add eggs, milk, oil and vanilla and beat with an electric mixture on low speed for about 2 minutes, and on high speed for about 3 minutes.

Step #3: Whisk in the boiling water. Batter must be very thin and runny so do not worry. That's exactly what it's suppose to be like.
Step #4: pour in two equal sized round cake pans and bake for about 45 minutes, or more if needed.
Step#5: When baked, take the cake out and leave to cool for about 5 minutes. Take the cake out of the pans and on two cake plates. Let cool.
Step #6: Cut out a smaller circle from the middle of one cake, you can use a round cookie shape to cut the cake out.
Step #7: fill the empty round space with ice cream, vanilla. 
Step #8: Layer this cake with the other one and cover your cake with Chocolate ganache.
Step #9: You can make your ganache with heating one cup heavy cream over low heat and melting 400 grams of chocolate (milk or dark) in it till the mixture is smooth and shiny. Put it in the refrigerator till its cool and thick enough. You can beat the ganache on max speed to get the desired thickness.

Cover the cake with ganache, i like to keep my ganache messy and more like an old fashioned home made style. My ganache is not really thick, its shiny and smooth. You can use Chocolate Buttercream instead of the ganache, but i prefer ganache, it give more luxury feel to the cake. 

Enjoy!


Thursday, July 10, 2014

Wild smokey eyes

She's a killer from the gang!
One of my beloved summer look is Smokey eyes! They add a bit of sophisticated drama to your look. They are perfect for night parties and dinners, concerts and gala! So let me just share with you, my secret summer look which never goes out of style!


Things you need:
- Essence night club glamour to go eyeshadow 
- Essence i<3extreme crazy volume mascara
- Kryolan aqua color black
- Essence 3D eyeshadow light
- essence shadow applicators by zeena
- Bourjois waterproof blue contour clubbing
- bourjois depuis 1863 blush
- Essence mattifying compact powder
- Bobby Brown blush on brush
- Bobby Brown eye shadow applicators 
- Maybelline Dream liquid mousse
- Mybelline FIT me (optional)
- essence nude colour lipstick

Start with your face!
You can use a brush to apply foundation, i used my hand cause that's the way i like it.
And because its summers, mattifying compact powder is a must for me!
Apply it all over your face.

Next comes the eyes!
Start with the blue shade in essence night club kit.
Apply blue shade in the inner corner of your eyes, covering half the eye lid.
Once it's done, pick a dark blue or purple shade from the kit.
Cover the outer corners of your eyes and make a V shaped corner. Don't forget to blend the dark shade with blue shade.
You've got to be very careful with the V shaped corner!
Once you're done with this, wet your eye shadow brush and apply Kryolan Aqua black color to the outer corner.

Use the dark purple shade again to shade your upper inner eye lid and lower outer lash line. This part is the tricky part.
Make it as darker as you want, remember, its a wild look.
Cover you lower, inner lash line with Bourjois contour clubbing.

Next comes the eye liner and mascara!
I used essence superfine eye liner and essence i<3extreme mascara

For the cheeks!
Bourjois depuis 1863 is my all time favourite blushon! Though for this look you need to apply a very little of it.

For the lips!
essence nude lipstick does the trick for this chic look!

And you're ready to go!


Saturday, June 28, 2014

Easy Chocolate Hazelnut Mousse

Mother Mousse
Jo Brand once said "Anything is good if its made of chocolate". Okay, chocolate is fine, i love chocolate, but what if it's chocolate mousse? oh better yet, chocolate hazelnut mousse. Oh shit, i'm going to be cheating on my diet, haha! Just kidding, i need calories, i mean look at me, i'm all bones.


Ingredients: 
1-3/4 cups cold milk
1 package (3.9 ounces) instant chocolate pudding
1/2 cup Nutella
1-3/4 cup whipped cream
Additional whipped cream

Directions: 

1. Whisk milk and pudding mix in a large bowl for 2 minutes. Let stand for 2 minutes or until soft set.


2. Whisk in Nutella until smooth.


3. Fold in whipped topping


4. Spoon into small dessert dishes. Chill until serving. Garnish servings with additional whipped topping.


Monday, June 9, 2014

DIY Gold Stars In A Jar

let it shine! 


Well, since my best friend is going through a gold addiction lately, I fugured why not make my first post, a gold post. Do you want a little gold in your room too? Nothing crazy but just enough? Well then, this DIY is for you! It is super simple and super cheap!


 Things you'll need: 
  • scissors 
  • a mason jar (i used one that was lying around my kitchen. You can use any you like) 
  • curling ribon (i couldn't find one in gold so i just bought a gold decor flower and used the ribon from it) 
If you decide to get the same decor flower, first you'll need to open it up without damaging the ribon too much. Be careful with that. Trust me,it rips easy. This part will be the hardest. You can use a paper instead of ribbon. I prefer ribbon because it gives a shine to the stars.
If you cant find a gold ribbon, you can always use a white ribbon and spray paint it golden.

Alright, so first, grab the end of the ribon, cross it behind and make a upside down tear shape, as shown in the picture below.


 Then, grab the smaller end of the ribbon and pass it all the way through the tear circle. 


 Once through, press down on the ribbon. You should have a pentagon looking shape by now.


 Fold the smaller end of the ribbon towards you, and the longer end, behind the pentagon, over, and, then across as shown below. 


keep folding the ribbon around the pentagon. Let the star guide you ;) 


Now, once you feel like the pentagon is thick enough, cut the ribbon and insert it through the triangle on the star as follow. You should now have a thick pentagon. 


Now comes the fun part! Push into the side of the pentagon as shown below,


and keep at it until you have done the same on all sides. You should now have your first star!


Following the same method, you can make as many stars as you like! Put them in a jar or paste them on your wall! You can even use these to decorate your frames. Be creative! 

Make them gold!


   Or make them colorful!


Sky is the limit!