Sunday, June 14, 2015

Makeup Tutorial: Smoked blue eyes

And Nude Lips!
I know i deleted my "Mermaid Eye" makeup tutorial and i promised you guys i'll be posting a better one. So this is it. Smokey blue eyes to go with soft nude lips and pink cheeks. I'll be using Essence metal glam blue eyeshadow with Naked 2 shades. These are the highlights of my tutorial.


Things i used:

Face:
- Clinique superbalanced makeup foundation
- beauty blender
- Catrice Blush 

Eyes:
- NAKED 2 
- Essence metal glam in blue
- Essence soo glow highlighter
- Rimmel Wonder'full mascara
- Bourjois waterproof eyeliner pencil in blue
- colorStudio eye stylist thin brush eyeliner
- eyeshadow brushes 

Lips:
- Maybelline honey beige lipstick


STEP#1 (face)

Clinique Superbalanced makeup foundation is a life saver in summers, specially for me, i happen to have oily skin which gets dry right after i wash my face. So i have to apply moisturizer every time i shower or even wash my hands and as i head out in sun, my makeup starts to melt down, which was my story before i found this secret potion in a small bottle. It is small for it's big price. The coverage is moderate and it's water-based, perfect for daily use. And perfect for me. 
Using a beauty blender, blend in the foundation on your entire face, starting from under your eyes area. You will not see any grey areas on your face if using this foundation. 

STEP#2 (eyes)


Chose the lightest shade in naked2 (that'll be foxy) and cover your entire eyelid.


Use Essence metal glam in blue to cover outer half of your eyelids. Blend using a soft medium sized eyeshadow brush. Starting from the outer corner of your eye, brush busted shades from Naked 2 into the crease of the eye. 


For the smokey effect, apply the blackout shade on the outer corner of your eyelid and blend it towards the end making an angle. I applied my blackout shade after applying my eyeliner so i make a neat winged eye.


Apply your winged eyeliner, i use a very thin brush for this. Either this or maybelline's gel with angled brush liner. (for eyeliner application method see my 10 minute flawless face makeup tutorial).


And for the final touch, apply your mascara. I'm using Rimmel's Wonder'full mascara. I happen to have very thin eyelashes, they are barely there, so this magical mascara does the trick for me. For me, this baby is my magic wand, and without this, i'm incomplete and weak. Seriously though, this is life. 
Apply essence soo glow highlighter just below your eyebrows and on the cheeks too (but later)

STEP#3 (Cheeks)


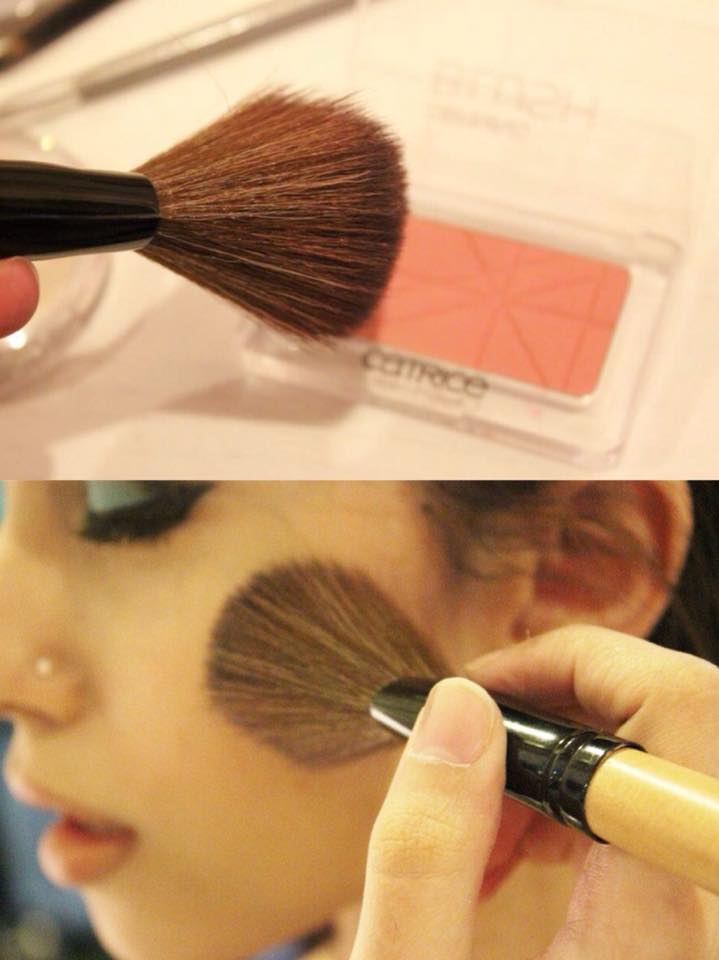
Keeping it a low key, apply blush with a big brush, starting from under your cheek bones all the way to your cheeks. 
This is the easiest part.

STEP#3 (lips)


Using Maybelline's Honey Beige lipstick, cover your lips all the way to their outer ends. Under the lower outer ends of your lips apply essence soo glow highlighter, also, apply highlighter on the cheek bones and under your eyebrow area. And you're good to go. 

Zooom, zoom!


Pin it if you like it, and leave me your comments! love, Ayesha. xx


Monday, May 25, 2015

Crazy Volume Curls

With Flat Iron!
I used to use curling rod/iron to curl my hair until one day I had to get ready, and I couldn't find my rod. That's when i discovered that i can curl my hair using my flat iron, and that's when i found i can curl better this way and quicker! Flat iron curls are heavy volume as well, also, you can use your flat iron for beach waves, heavy waves, loose curls and blow dry waves as well! Isn't that like the best thing ever? 
So here's my tutorial on how i curl my hair using flat iron. I don't use heat protection (i know i should). And if you ask me for recommendation, i'd suggest you to go for TRESemme Heat Tamer Spray or L'Oreal Elentt Heat Defence Spray. 


Here's my straightener. I use Remington and I'd suggest you to use it too. 


Here's what i do:
To curl your hair: Take a thin section of your hair and hold the straightener near your roots, straightener must be straight (horizontal) and slowly curl a little (less than 180 degrees) and pull, towards the ends, you must do this very slowly holding the straightener very tight. To make this clear and better to understand see the video below. 


And.. enjoy!


Tuesday, April 28, 2015

DIY lip scrub

Jell-o flavored! 
A must have for summer's dry humid days.

Follow the instructions in the pictures below and say bye-bye to your chapped lips! xx


Step #1

Step #2

Step #3

Final Step. 
Add your scrub in the container. I used a small glove container that comes with Lo'real hair dye that i use.

Try not to eat it though! 


Wednesday, March 25, 2015

Detox Water

Welcome Summers!
We welcome you with our new healthy obsession. Obsession that helps burn body fat, rids your body from harmful toxins, good for digestion, perfect for clear skin and comes with other healthy benefits. This new must-have drink in summers is Detox water, yes! Detox water is taking over instagram and twitter, every health guru posting snaps of their water bottles filled with this chilled fruity drink.
I have collected few of the best detox recipes for you to make, one's that are best in taste and benefits. You can carry them with you to your daily workout sessions or just simply drink them through the day for maintaining a healthy life style.


Here are the recipes;
For clear skin: (my favorite)

You'll need:
- Lemon (sliced)
- Cucumber (sliced)
- Crushed mint leaves
- filtered water
Directions:
Fill your water bottle with water and put all these ingredients in. Close and refrigerate overnight. Put ice if you like and drink through the day. This water also helps rid your body of toxins and cleanse it. This is my favorite detox water recipe and i drink it every day, all day, in summers. This tastes good too, it's a zero calorie water. But at times i put some sugar in it too, for better taste. When you drink up all the water you can refill your bottle and put it overnight again.
For flat tummy, add 1 table spoon of grated ginger.

Fat flush water
- 1 orange sliced
- 1 lime sliced
- 1 lemon sliced
- 1/3 cup grapes
- mint leaves crushed
- filtered water (as much as to fill one water bottle)
Directions:
Fill your bottle with water and all these ingredients, refrigerate for half an hour and enjoy drinking it throughout the day. 


Metabolism Boost
- Green tea bag
- half orange sliced
- mint leaves
- lemon sliced
- water
Directions:
Just like any other detox water recipe, you put all ingredients in your water bottle and refrigerate overnight and drink it through the day. Green tea has benefits like burning the fat and digestion. Lemons are very good for skin and helps flush out toxins.

Other recipes:

- Lime, Lemon and Orange: For digestion, Vitamin C, immune defense and heartburn. Drink at room temperature.
- Green tea, Mint, Lime: fat burning, digestion and headaches.
- Cucumber, Lime and lemon: water weight management, bloating, appetite control, hydration and digestion. 
- Strawberry and Kiwi: cardiovascular health, immune system defense, blood sugar regulation and digestion. 


Love the post? Don't forget to pin it! Have an awesome summers ya'll. xoxo


Saturday, March 21, 2015

DIY Cosmetic Stand

Or call it Cake Stand,
Or anything-at-all stand!


 I got this idea when i basically wanted a cheap and easy to make cake stand. It turned out so well i'm using it for my perfume collection, also i made one for my makeup and other stuff and of-course one for my cakes. 
The stand in the above picture was made with Ferrero Rocher chocolate box (the top) and Puck cream cheese glass (the base), and few other things for decoration. It's super easy, and to be fair, anyone can make it, whether you're diy project expert or not. So you ready? Let's turn ferrero chocolate box into cake stand!


Things you need:
- Ferrero Rocher chocolate box
- Small desert glass (or you can use Puck cream cheese glass like i did in the first picture)

Things you need for decor:

- Some cloth pieces
- card board
- scissors 
- liquid glue or glue gun
- ribbon
- cutter 

Directions:

Cut the card board the size of chocolate box and cover with cloth, simply or with some patter. I used glue gun for pasting. Next, you paste the card board on top of the box! 


With one chocolate bow you can make two cake stands. I made one with Puck glass and one with small desert glass. 
After your done with the top, using glue gun or fixing super glue, secure your glass to the bottom of the box, making sure it's in the center. Leave it to let the glue dry.
You can paste some ribbon on the edges of the box, use some diamonties or stones to make it more pretty. I kept my stands simple for i can use them for me cakes too. The simpler the better, right? So basically this project has just two steps, decorating and pasting, and you're done!
Here are the pictures of the stand!
Don't forget to pin it!